Using Globus in Jupyter Notebooks
May 30, 2018 | Lee Liming
My last post introduced the Jupyter “live notebook” environment and explained why our Globus team is working to make it easier to use Globus services in the Jupyter environment. Now, it’s time to share some of the cool things you can do with Globus and Jupyter.
In this post, I’ll cover how to access Globus services in Jupyter notebooks, how to set up a multi-user JupyterHub to use Globus for user logins, and how to access Globus access tokens in a notebook after logging in with Globus.
Use the Globus SDK in your notebooks
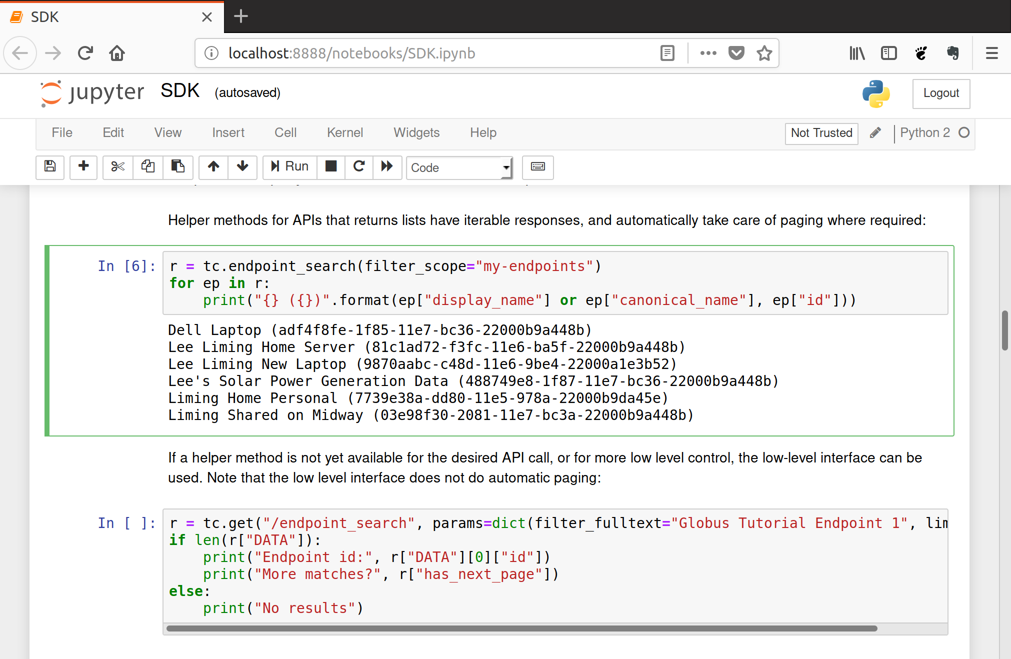
The Globus Python SDK allows you to access and control Globus services using Python code. You can write code to control data transfers between systems, access your transfer history, examine your authentication credentials, and more. You can use this SDK in your Jupyter notebooks! The notebook environment is a great way to experiment with the SDK as you learn how it works and what you can do with it. It’s also a good way to prototype your workflows and automation code as a step toward writing your own standalone data applications.

Figure 1. Control Globus services with Python code in a notebook! This example displays a listing of my Globus endpoints where my research data lives.
To use the Globus SDK in a notebook, you need to install the Globus SDK into the Python environment where you start your notebook server. First, install the Jupyter Notebook application. Then, follow the Globus SDK installation instructions to add the Globus SDK to the same environment. Then, when you start your notebook server, the Globus SDK will be available.
The Globus SDK Tutorial provides a good introduction to the SDK and how to get started using it. To experience how the SDK works in a Jupyter notebook, use the example notebooks provided by Globus. (Follow the README.md file in the GitHub repository to get started.) The tutorial and example notebooks will show you how you can access Globus within your notebook, including accessing Globus Connect servers and shared endpoints, transferring data between Globus endpoints, uploading and downloading data in the notebook, and more. Because you’re using Globus, all of this done securely, using your identity as authenticated by your home institution.
Use Globus to log in to your JupyterHub
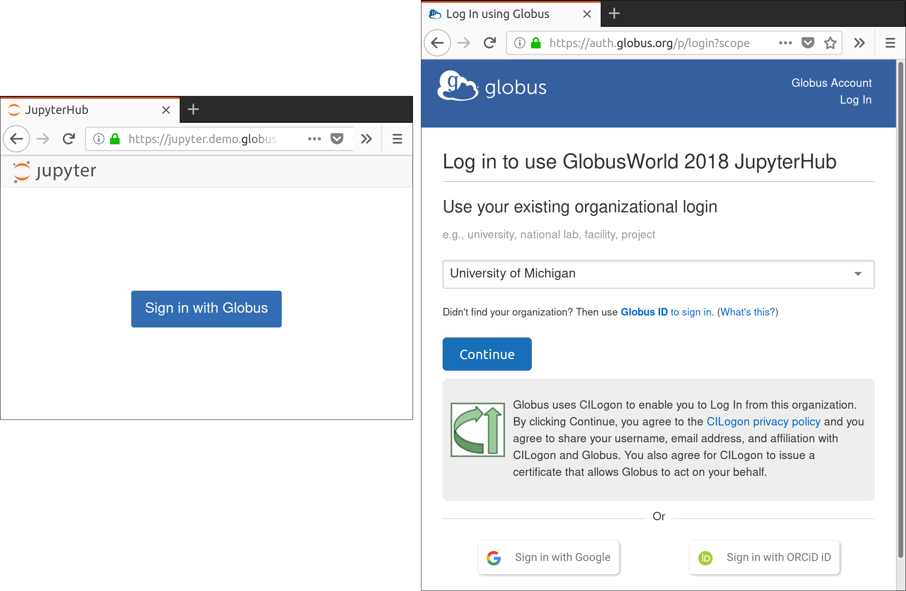
Researchers and educators who use Jupyter often set up a JupyterHub for their teams or classes. The JupyterHub allows team members to log in to the Hub and create, use, and share notebooks without installing any software on their own systems. Globus makes this easier by allowing team members to log in to the Hub using their existing campus or lab identities. Better still, when you log in to the Hub using Globus, you can write code in your notebooks using Globus services (e.g., to import/export data from secure storage sites) without logging in again.

Figure 2. JupyterHub users can “Sign in with Globus” using the accounts they already have at universities, labs, or other research organizations (including Google).
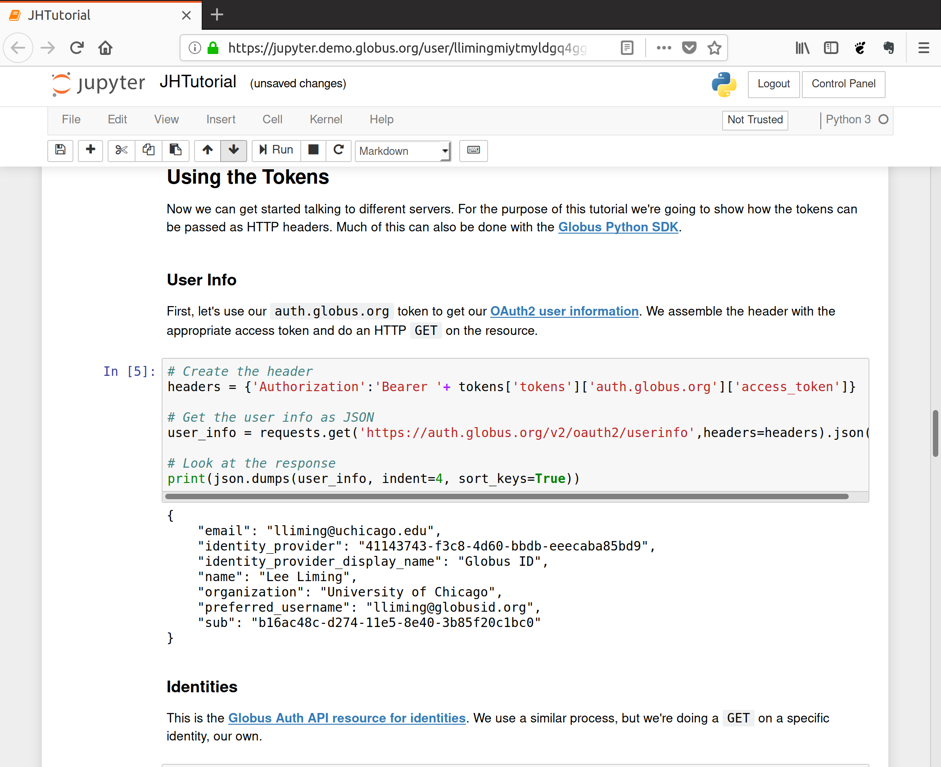
To set up a JupyterHub with Globus logins, use the JupyerHub OAuthenticator and follow the installation instructions, particularly the section titled Globus Setup. As the instructions say, you’ll need to register your Hub as a Globus application, which takes just a few minutes, and then edit your jupyterhub_config file as indicated. When teammates or students log in to your Hub using Globus, the Hub automatically passes the resulting Globus access tokens into the Python environments in any Jupyter notebooks they open or create. So now they can access Globus functionality (like file transfer and data sharing) securely in the notebook, using their own identity. Globus developer Nick Saint has written up details on how this works, and Globus has another example notebook that steps through the code needed to access the tokens.

Figure 3. After logging into a Hub with Globus, your Globus access tokens allow you to securely access Globus services.
If you are using a Hub with Globus login enabled, Hub users don’t have to login (again) within their notebooks to use Globus services. Globus has provided another version of the Globus SDK example notebook that uses the access tokens provided by the Hub instead of logging in within the notebook. (Of course, this particular notebook must be used in a Hub with Globus login enabled.)
Scale up your JupyterHub
If your JupyterHub server is getting overloaded, you can scale your Hub up from a single server to a cluster (even a virtual cluster in AWS, Azure, or Google Cloud) using Zero to JupyterHub, an easy-to-follow recipe for setting up a cluster and deploying a JupyterHub on it, leveraging the Kubernetes system for application scaling. Notebook servers are run on separate nodes in the cluster, and the Hub transparently connects users to their notebooks.
When using Zero to JupyterHub and the Sign in with Globus method from the previous section, the Hub will securely pass Globus access tokens into users’ notebooks, even if they’re running on different nodes in the cluster. (Globus is excited to be one of the first authentication services to use this recently added feature in JupyterHub.)
What does this all mean?
In the previous sections, I described how you can access the Globus SDK in Jupyter notebooks, set up a Hub to use Globus for logging in, access the Globus tokens in notebooks launched from a Hub, and scale your Hub to support many users.
So what does this mean for you, your students, and your research colleagues?
I’ll offer one example by describing how we (the Globus team) use this ourselves. We frequently offer Globus tutorials, both online and in different locations around the United States and Canada. Our tutorials are hands-on: we enable attendees to try things out on their own laptops during the tutorial or afterwards in their offices or labs. We’ve found the Jupyter notebook environment to be particularly friendly for first-time coders, so we use notebooks in our tutorials on developing applications and automating data workflows.
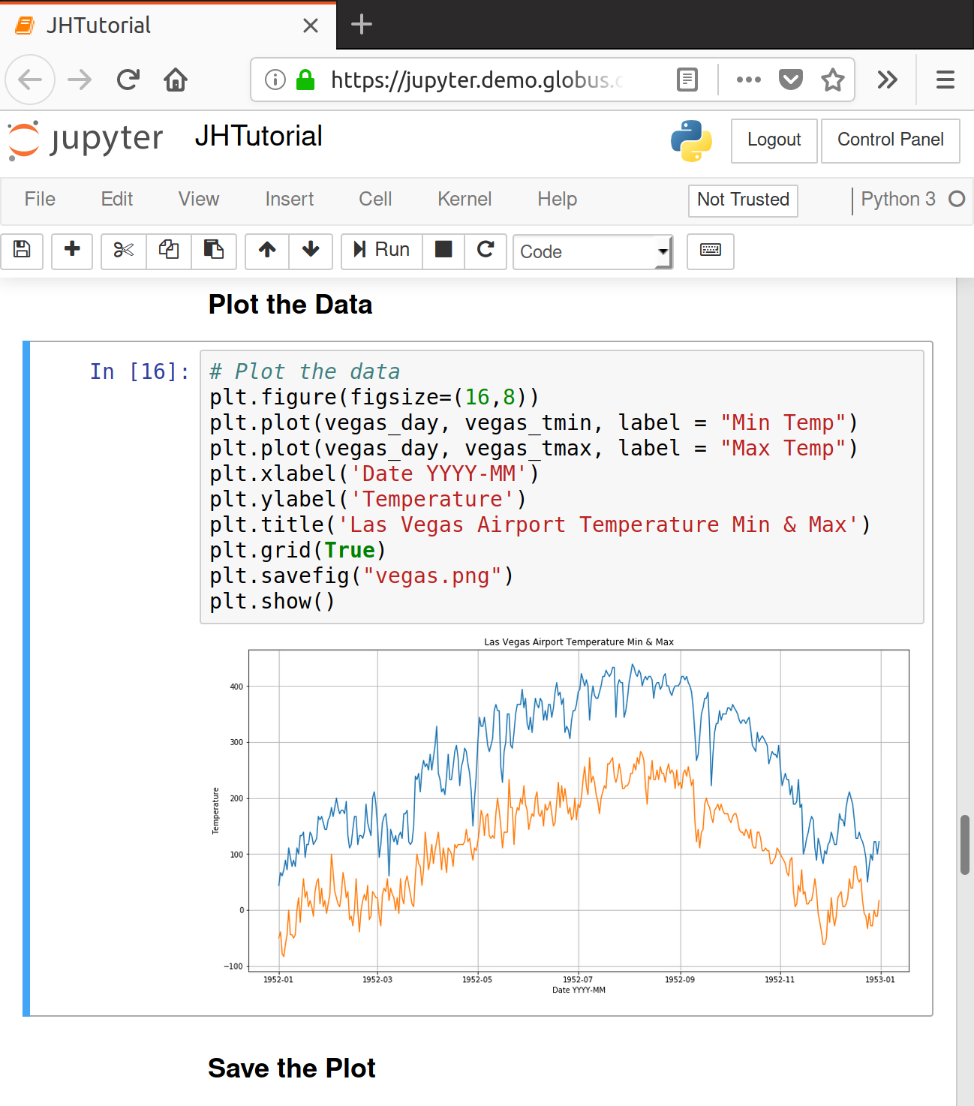
To support our tutorials, we used the Zero to JupyterHub recipe referenced above to set up a virtual cluster in AWS and deploy a JupyterHub configured with the “Sign in with Globus” feature. During the tutorial, we invite attendees to sign in to our Hub with Globus (using their campus login services) and launch their own notebook server. They can then use our tutorial notebooks to follow along in the tutorials and try out variations to ensure they understand the examples.

Figure 4. Globus tutorial attendees log in to our tutorial Hub with Globus, then use secure Globus services to access, analyze, and share data with others.
Our tutorials typically involve setting up a Globus Connect endpoint to allow secure file sharing, moving data from a notebook to the shared endpoint, and accessing data from the shared endpoint to use it in a notebook. This demonstrates how a group (like a class of students or a team of research collaborators) can use Globus to securely gather and share data. More advanced tutorials cover using Globus for metadata creation and searching and data publication workflows. With the Globus SDK, all of this can be done in a Jupyter notebook.
Everything mentioned in this post can be done using the linked documentation and GitHub projects. But some of it (like setting up a multi-user JupyterHub) is a bit tricky. Nothing beats hands-on, interactive experience, so I recommend attending one of the upcoming GlobusWorld Tour events (like the one coming up in June at Urbana, IL) and signing up to host one at your institution. Our team is looking forward to seeing you there!